Paver Patio Installation & Construction Bay AreaBay Area
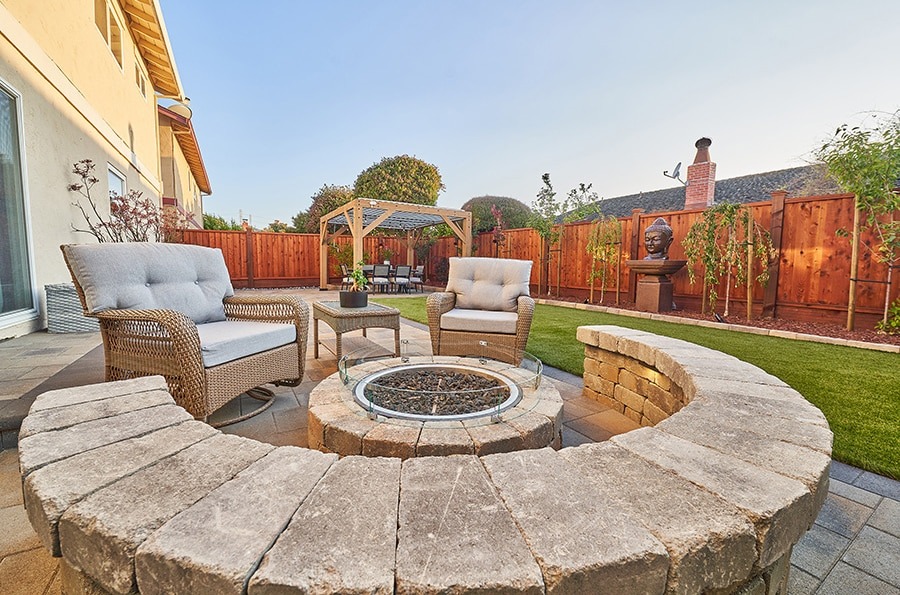
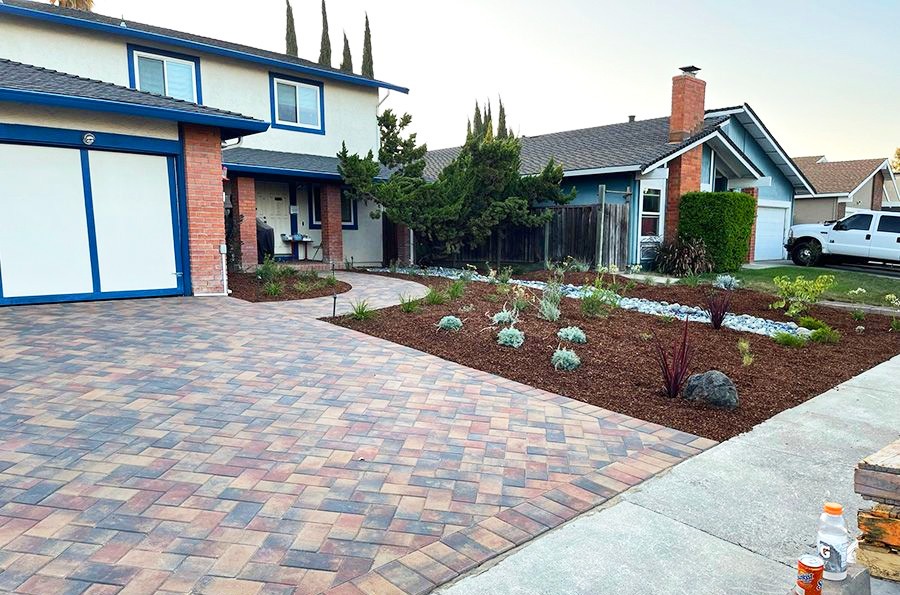
Transform your outdoor living space with expert paver patio installation services from Opulands. Whether you’re envisioning a cozy backyard retreat or a warm front yard for welcoming guests, our team specializes in high-quality paver patio construction tailored to your home’s aesthetic and functional needs. We combine durable materials with skilled craftsmanship to ensure a long-lasting and visually stunning result. Let Opulands bring your patio vision to life with precision, care, and a commitment to excellence.
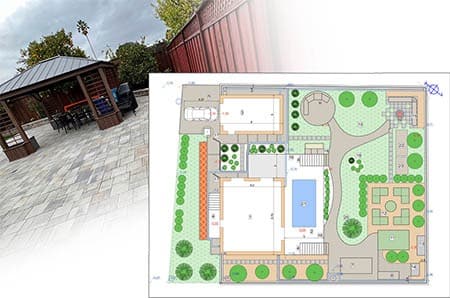
Plan Your Perfect Paver Patio Project

Every breathtaking paver patio begins with thoughtful planning months before the first shovel touches soil. Your careful preparation ensures the patio serves as both a functional extension of your home and a striking outdoor sanctuary designed to last decades. Let’s explore the essential elements that guarantee patio perfection.
Choosing the Right Location and Size
Successful patio placement balances practical needs with aesthetic vision. Position your patio at least a few feet away from your home’s foundation to create genuinely usable space—areas directly against the house often prove challenging to furnish properly. The Bay Area’s varied terrain demands careful assessment of natural drainage patterns to avoid costly water accumulation issues later.
Space requirements differ dramatically based on how you’ll use your outdoor oasis. Expert designers recommend a minimum of 25 square feet per person for comfortable movement. A standard 6-foot patio table with chairs needs at least 150 square feet of dedicated space, while entertaining guests comfortably requires approximately 550 square feet.
Your patio should breathe with purpose. When incorporating multiple features—perhaps an outdoor kitchen, dining space, and cozy fire pit—create clear pathways allowing guests to flow naturally between areas without feeling confined.
Selecting Paver Types and Patterns
Your paver selection frames the personality of your outdoor space while determining its long-term durability. Three primary paver materials stand out for Bay Area homeowners:
- Concrete pavers – Budget-friendly ($4-$10 per square foot), remarkably versatile in colors and shapes, with excellent durability. These manufactured options offer unmatched design flexibility for most projects.
- Brick pavers – Classic clay-based choices ($6-$12 per square foot) that maintain their rich color through years of California sunshine. They deliver timeless appeal though with fewer color variations.
- Natural stone pavers – Premium selections including limestone ($5-$10/sq ft), flagstone ($15-$20/sq ft), or bluestone ($17-$25/sq ft). These pavers showcase nature’s artistry at higher investment levels.
Paver patterns elevate your design from ordinary to extraordinary. Herringbone patterns create interlocking stability perfect for driveways. Basketweave designs feature alternating perpendicular arrangements for traditional elegance. Running bond mimics classic brickwork, while circular designs establish stunning focal points throughout your space.
Scale matters tremendously. Large-format pavers create sleek, contemporary appeal in expansive areas with fewer joint lines to interrupt the eye. Smaller pavers excel in intimate spaces and navigate curved designs with graceful precision.
Calculating Materials and Tools Needed
Precise material estimates prevent mid-project delays and unexpected costs. Your standard paver patio requires:
- Paver stones (calculate total square footage plus an additional 10% for inevitable cuts and breakage)
- Gravel base material (6 inches deep when properly compacted)
- Paver sand (1-inch layer for perfect leveling)
- Edge restraints and spikes to maintain structural integrity
Your tool arsenal should include a shovel, rake, tamper, level, rubber mallet, tape measure, wheelbarrow, and appropriate safety gear. Larger projects benefit tremendously from a rented plate compactor—this essential tool ensures proper base compaction impossible to achieve by hand.
Many home improvement stores offer specialized paver calculators to determine precise material quantities based on your specific project dimensions and design complexity.

Preparing the Ground for Installation
The foundation beneath your paver patio serves as the backbone for decades of outdoor enjoyment. Bay Area soil conditions demand meticulous ground preparation—a phase where shortcuts lead to disappointment, while patience creates lasting beauty. This stage requires both technical precision and physical determination, setting the stage for everything that follows.
Marking and Excavating the Area
Begin by clearly defining your installation area with white marking paint, which conveniently won’t interfere with utility location services. Professional landscapers always extend their markings approximately 6 inches beyond planned patio edges, creating necessary space for essential edge restraints.
Perfect geometry creates visual harmony in your outdoor space. Establish precise square corners using stakes, string, and the time-tested 3-4-5 method. This triangulation technique ensures your layout features proper right angles for a polished, professional appearance that complements your home’s architecture.
Excavation depth requirements fluctuate based on your patio’s intended purpose:
- 7 inches for pedestrian-only gathering spaces
- 9-13 inches for areas supporting vehicle traffic
The Bay Area’s clay-heavy soils demand special attention during excavation. When you encounter large divots in the excavated area, resist the temptation to backfill with removed soil. This creates weak spots in your foundation. Instead, fill these areas with gravel and hand-tamp thoroughly to maintain consistent structural integrity throughout the base.
Ensuring Proper Slope and Drainage
Water management makes or breaks a paver patio installation. Heavy winter rains in Northern California require thoughtful drainage planning from the start. Establish proper grade by adjusting string lines to slope gently away from your home and any other structures. The golden rule for patios remains a 1-2% slope—approximately 1/4 inch drop per foot of distance.
Master this professional technique for checking slope accuracy: secure a 1/2-inch spacer to one end of a 4-foot level. When the bubble centers perfectly, you’ve achieved the ideal 1% slope that balances drainage needs with comfortable footing.
After excavation, unroll geotextile fabric across the exposed soil surface. This crucial barrier prevents soil from migrating upward into your gravel while encouraging proper compaction and settlement. The minimal additional cost of this material pays dividends through extended patio longevity.
Laying and Compacting the Gravel Base
Select 3/4″-0 or ODOT road base gravel for superior stability, applying it in carefully measured layers:
- 4 inches for pedestrian gathering spaces
- 6-10 inches for areas bearing vehicle traffic
The secret to exceptional compaction lies not in brute force but in methodical approach. Compact the gravel in 2-inch “lifts” rather than attempting to compress the entire depth at once. Each pass with a steel plate compactor should create a satisfying transformation from loose aggregate to solid foundation.
Successful compaction depends on proper equipment selection. Generally, a plate compactor can effectively compact approximately as many inches of gravel as it takes people to lift the machine. After finishing each layer, verify flatness by sliding a straight board across the surface.
The completed base must achieve near-perfect levelness, with no dips or rises exceeding 1/8 inch across the entire area. This exacting standard might seem excessive, but such attention to detail prevents future shifting and ensures your paver patio remains the crown jewel of your landscape for years to come.
Installing the Pavers Step by Step

The moment has arrived to bring your paver vision to life. With your foundation meticulously prepared, you now enter the most gratifying phase of your outdoor transformation—laying the actual pavers that guests will admire for years to come. This stage requires precision balanced with artistry as you create a surface that’s both stunning and enduring.
Adding and Leveling the Sand Layer
The sand bedding creates a malleable cradle that allows each paver to find its perfect home. Begin by placing 1-inch diameter PVC pipes or metal conduit across your compacted base as elevation guides. Spread concrete sand generously between these pipes to a depth of 1-1.5 inches.
Next comes the crucial screeding process. Draw a straight 2×4 board across the pipes with a smooth sawing motion, creating a perfectly level sand canvas for your pavers. This technique, mastered through practice, ensures a flawlessly flat installation surface. After screeding, delicately remove the pipes and fill the remaining channels with additional sand, maintaining your level plane.
Pro tip: Resist any urge to compact the sand layer—it must remain loose to allow each paver to settle naturally when placed, creating the ideal foundation for long-term stability.
Laying Pavers in Your Chosen Pattern
Begin your paver placement at a fixed corner, working outward in a triangular pattern that maintains geometric precision. Set each paver by lowering it straight down into position—never drag pavers across the sand as this disrupts your meticulously prepared bed. Position each piece snugly against its neighbors, maintaining consistent joint spacing that creates visual rhythm throughout your patio.
The pattern you select dramatically influences your patio’s character. Herringbone patterns offer excellent interlocking stability, particularly valuable for driveways. Basketweave designs, with their alternating perpendicular rectangles, create a timeless, classic appeal. Running bond patterns echo traditional brickwork for elegant simplicity. For more expansive patios, consider modular designs using varying paver sizes to create a sophisticated, less repetitive visual landscape.
Cutting Pavers for Edges and Curves
Exquisite edge details separate amateur projects from professional installations. Mark precise cutting lines directly on each paver using chalk or a specialized paver marker. When crafting curves, use a garden hose or flexible PVC pipe as your guide to ensure graceful, flowing lines that complement your landscape’s natural contours.
A quality wet saw equipped with a diamond blade produces the cleanest, most professional cuts. When navigating curved edges, make multiple small, strategic cuts rather than attempting to force a curve with the blade. Always prioritize safety with appropriate eyewear, hearing protection, and dust masks, as cutting generates significant particulate matter.
Installing Edge Restraints
Edge restraints serve as the frame that contains your paver masterpiece, preventing pavers from migrating or separating as seasons change. Install these crucial elements after your pavers are in place by first carefully scraping away sand from the patio edges.
Position each restraint firmly against the paver perimeter, then anchor securely with 10-inch non-galvanized landscape spikes placed in every third pre-formed hole. The final touch involves covering the exposed restraint with excess sand or soil, protecting it from harmful UV damage while creating a seamless transition to your surrounding landscape.

Avoiding Common Mistakes During Paver Installation
Even seasoned Bay Area homeowners tackling DIY paver projects can fall prey to critical errors that undermine their hard work. Our team has witnessed beautiful patios fail prematurely due to seemingly minor installation oversights. Let’s examine the most common pitfalls that can compromise your outdoor investment before it has a chance to shine.
Skipping Compaction or Slope Checks
Proper compaction stands as the bedrock of paver longevity. Rushing past this crucial step inevitably leads to weakened pavement surfaces and eventual joint failure. Pavers installed over inadequately compacted materials mirror any shifting or settling in the base layer, creating unsightly dips and hazardous uneven surfaces.
The Bay Area’s seasonal moisture fluctuations magnify the consequences of poor compaction. Each tiny void within your sub-base becomes a miniature reservoir where water collects, expands during colder months, and gradually deforms your once-level surface. For driveways, the repeated weight of vehicles will press pavers into these weak spots, forming dangerous ruts and grooves that worsen with each passing season.
Proper technique: Master compaction by working with thin 2-4 inch layers rather than attempting to compact thick sections all at once. Most standard plate compactors simply cannot effectively compress more than 4 inches of base material regardless of operator skill or machine weight.
Create Your Dream Outdoor Space with Expert Paver Patio Construction
Bring your vision to life with expert paver patio construction that reflects your lifestyle and goals. Whether you’re building a cozy family space or boosting your home’s value, your patio becomes the foundation for everyday moments and lasting memories. Start planning today—your ideal outdoor retreat is just a build away.
Your completed paver patio stands as more than constructed elements—Opulands becomes the backdrop for countless cherished moments, from sunrise coffee reflections to evening gatherings beneath the Bay Area’s spectacular night skies. This thoughtful investment enriches both your daily living experience and your property’s enduring value for years to come. Contact us today to get started.
FAQs
The cost of a paver patio can vary significantly. Professional installations average around $3,800, while DIY projects can range from $500 to $1,500, depending on the size and materials used.
The ideal size depends on your intended use. As a general rule, allow at least 25 square feet per person for comfortable movement. For entertaining, aim for approximately 550 square feet. Consider your specific needs, such as accommodating outdoor furniture or multiple functional areas.
For the bedding layer, use concrete sand as it’s coarse, compacts uniformly, and allows adequate drainage. For filling joints between pavers, polymeric sand is recommended as it prevents weed growth and resists washing out during rainfall.
The excavation depth depends on the patio’s purpose. For pedestrian-only patios, excavate about 7 inches. For areas that will bear vehicle traffic, excavate 9-13 inches. This depth allows for proper base material and paver installation.
A paver patio should have a slope of 1-2% away from any structures to prevent water pooling. This translates to approximately a 1/4 inch drop per foot. Use a level with a spacer to check for proper slope during installation.